7 Best In-Ear Monitors for Drummers
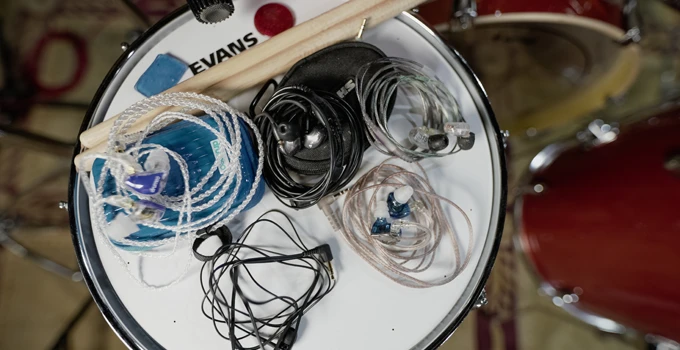

Sick of assaulting your eardrums or not being able to keep time with your bandmates while playing on stage? Luckily, an easy solution lies in a tiny, unassuming device: the in-ear monitor.
Not only can great in-ear monitors save your hearing, but they also allow you to hear every nuanced snare hit and cymbal crash with crystal clarity, no matter where you’re playing.
If you play in a band, at some point, you are going to want to switch away from wedge monitors to
Wedges create unnecessary stage volume (this can create issues with the front of house), damage your ears, are difficult to hear (especially as a drummer), never are loud enough, and cause horrid amounts of feedback from microphones.
If you do still use wedges, I suggest at least using earplugs to protect your hearing on stage. Before we dive into our best picks, let’s talk briefly about custom and universal in-ear monitors.
Custom Vs Universal Fit In-Ear Monitors
Custom-fit IEMs provide a better seal between the ear canal and exterior sound. They isolate far better and are easier to use. Since they are molded from your ears, you can easily pop them in and out. You’ll be required to go to an audiologist to have a mold of your ears made. Custom IEMs are more expensive and typically will have better-sounding drivers.
Universal IEMs are much more affordable and include tips or different materials and sizes. The isolation isn’t as great, and the sound of some of the entry-level models isn’t the best. Choosing between custom and universal in-ears comes down to a few factors:
- Do you want the best performance? Custom.
- Are you a professional touring musician? Custom.
- Are you on a budget? Universal.
- Do you need IEMs for practice exclusively? Universal.
With that out of the way, let’s dive into the world of in-ear monitors and find the best ones to take your live performances to the next level!
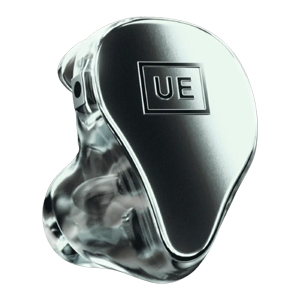
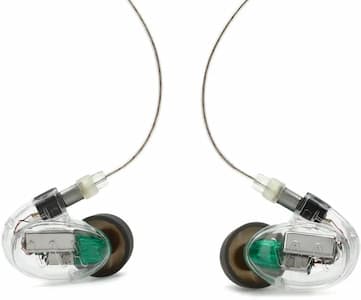
If you’re a professional musician or have a big budget, hands down, the best option is the new pair of IEMs from Ultimate Ears, their Premier line. These are brand new, and I was lucky enough to test them at this year’s NAMM show in Anaheim, CA.
UE PREMIER are UE Pro’s most potent, nimble, and versatile in-ear monitors to date, and they sound incredible. They have an industry-leading 21 drivers per side and a frequency range of 5Hz-40kHz. UE PREMIER establishes a new benchmark for outstanding sound quality, whether it be used for live performances, studio recordings, or listening to music.
- True Tone Plus
- Quad High Super Tweeter
- Quad-Mid Driver
- 4 Dual Diaphragm Mid-Low Drivers
- 2 Dual Sub-Low Drivers
- 5-Way Passive Crossover
- Frequency: 5Hz-40kHz
- Isolation: -26dB
At the Ultimate Ears booth, they had a pair of the Premiers set up with universal tips. I was able to hear the sound of the drivers and was blown away. I can only imagine what it will be like with a custom fit (which I also got fitted at the booth). Not only are these great for the stage, but the Premiers would be great for checking a mix on the fly.
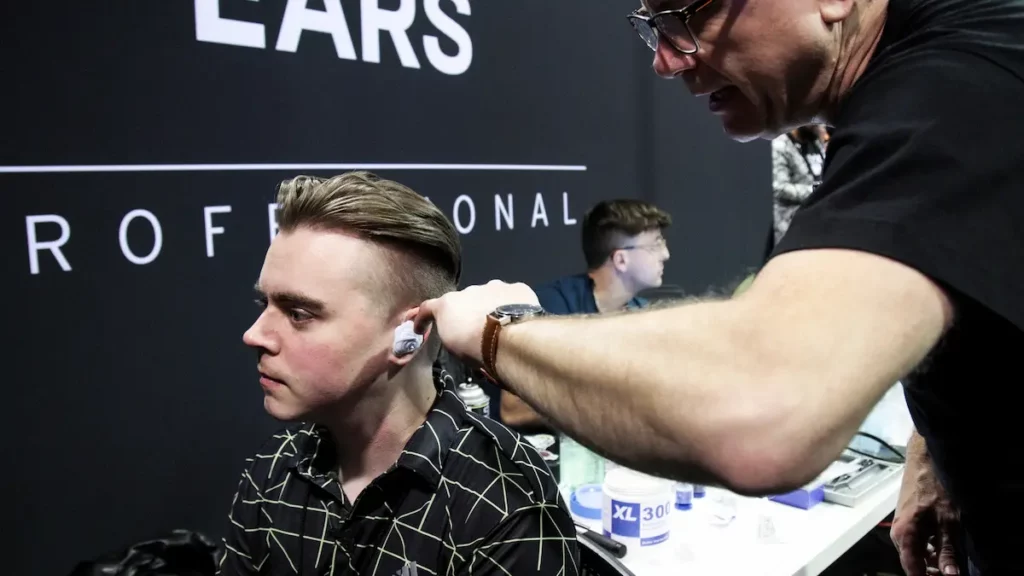
The Ultimate Ears Premiers are the most expensive and best custom in-ear solution on the list, but they’re here for a good reason.
“Building upon the success of the groundbreaking UE LIVE, we wanted to push ourselves to the limit of what was previously thought possible. Our team of experts embarked on a mission to take our technology further than ever before. UE PREMIER represents the pinnacle of UE Pro innovation, with immersive studio-quality sound that brings even the most intricate details into focus.”
Philippe Depallens, VP & General Manager, Ultimate Ears Pro
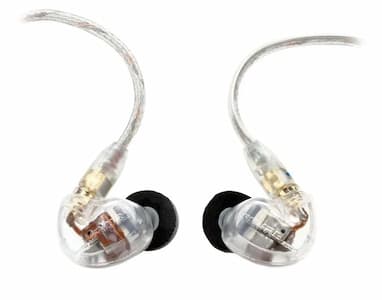
Shure SE535
The Shure SE535 in-ear monitors are the holy grail of ear candy for drummers. The sound quality is some of the crispest and most transparent I’ve heard outside the custom in-ear realm.
The 535s are the best bang for your buck regarding three-driver in-ear monitors. And let’s be honest, nobody has time for a one-driver entry-level setup. The thing about drivers is that the quality becomes less exponential the further you take it.
For example, if you’re considering upgrading to something with more drivers, the difference between three and six is far less than between one and three.
If you know anything about Shure, you know that their years of reliability aren’t going to steer you wrong. They make their own drivers and always bring the heat, no matter the price.
Sure, you could argue that if you want to take it up a notch, you could consider going custom-made. But the Shure 535s will do just fine for the rest of us mortals.
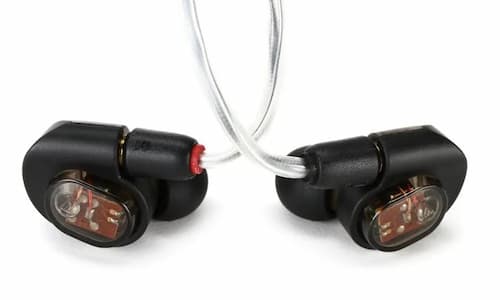
Audio-Technica ATH-E70s
These bad boys from Audio Technica are the real deal. Perfect for live in the studio and on-stage, these in-ear monitor headphones fit snugly in your ear and are supremely comfortable.
And if you’re going to be wearing these for hours on end, you want them to be as comfortable as possible.
The ATH-E70s feature comfortable silicone and high-end foam Comply tips that seal perfectly to enhance the listening experience. Plus, the detachable memory cable allows you to move around like a rockstar (or pace around nervously before a big gig).
But let’s get to the good stuff — the sound. These babies boast three balanced armature drivers, providing an extended frequency response and nuanced sound stage. Translation? Your band will sound so incredible you’ll swear you’re listening to it for the first time.
Of course, you’re probably thinking – “But these are expensive!” And yeah, when pitted against most in-ear monitors, they’re costly. But trust me, the crisp sound quality is worth every penny. Plus, they come with a carrying case and a 6.3mm stereo adapter plug.
With a 20Hz-19kHz frequency range, 109dBs of sensitivity, and a 39-ohm nominal impedance rating, these headphones provide impressive noise isolation so you can focus on playing without distractions.
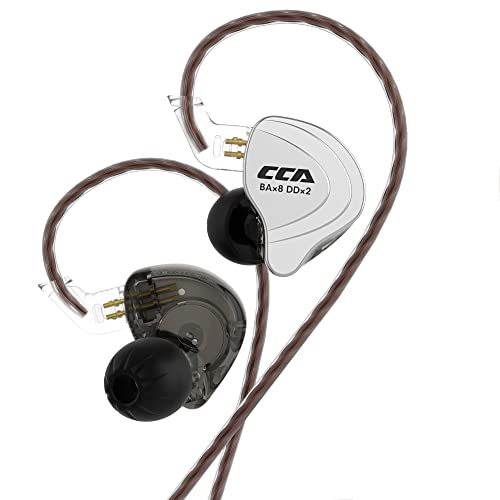
Clear-Concept Audio CCA C10
Clear Concept Audio’s C10 earphones offer the perfect blend of style and substance and even come in six different finishes that can match any stage outfit. These hi-fi earphones use a zinc and resin alloy shell with what might be the best build quality in the industry.
If that wasn’t enough, they also boast an impressive 10-hybrid driver design with five on the left and five on the right, making them effective for noise cancellation.
As with the IEMs above, these also come with detachable cables, allowing for wireless with a Bluetooth adapter. You also get a memory cable.
But be aware of the low price, as the C10s have all the features of pricier IEMs. Four quality armature drivers and a single dynamic driver deliver excellent sound quality and cancel noise at an impressive 108dB, thanks to the onboard MEMS noise-canceling features.
Plus, with a sold seal from the tips made from durable silicone, the C10s offer near-complete isolation.
Westone UM-Pro 30s
Westone has been a key player in the custom in-ear business for over 40 years, and if you ask just about anyone about in-ears, you’ll hear the name Westone. While options are available with one, two, three, or five drivers, the triple armature driver version is arguably one of the most used among drummers, and for a good reason.
These in-ears offer exceptional value for the sub-$300 price point, which is uncommon for in-ear monitors with three drivers. This is one of the main things that has earned the Westone model a spot on the must-have list.
If you’re a fan of the Westone sound or a drummer looking to upgrade to a triple-driver in-ear without breaking the bank, this model is perfect.
It’s impressive how Westone has managed to offer as many drivers as possible for under $300, and if you’re looking to step up your game on a budget, this model is the way to go.
Pros: comes with plenty of accessories, clear sound, has a triple driver with a low cost
Cons: does not have the best bass response
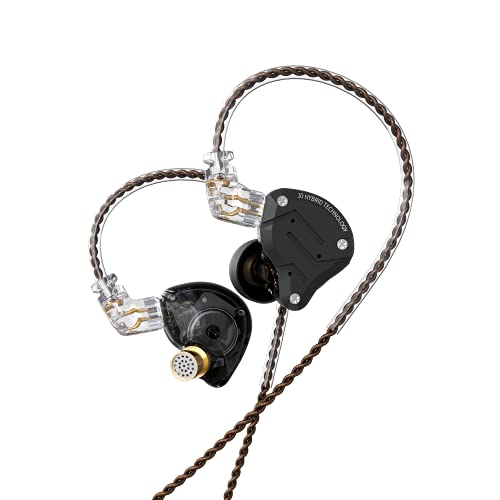
Kinboofi KZ ZS10
If you’re in the market for a budget-friendly IEM, the KZ ZS10 Pro from KINBOOFI Audio is a solid choice. It has three ear tip pairs, a detachable cable, and a helpful manual.
Plus, you get a sleek, lightweight design with shells made of stainless steel and resin and three style options. Plus, they’re incredibly comfortable and fit perfectly in your ear.
The 120cm braided cable is flexible, though, unfortunately, it tends to tangle easily. Luckily, that slight disadvantage is balanced out by the four armatures and double magnetic dynamic driver, delivering 30-ohm impedance, 111dBs of sensitivity, and an ultra-wide frequency range.
You get a tight mid-frequency dynamic driver that delivers a solid sound for loud live shows.
When put up against the previous model, the ZS10 Pro offers a much improved, richer, and more transparent bass and treble tone without distortion. Plus, the isolation is top-notch, with a minimal sound leak.
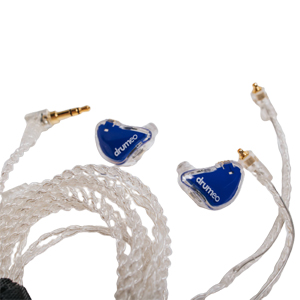
Drumeo EarDrums
Drumeo EarDrums are professional-grade in-ear monitors that give drummers a complete range of sound while protecting their ears from harmful noise. The EarDrums’ triple driver headphones capture every nuance of a drum kit’s sound, from the kick drum’s deep thud to the cymbal’s dazzling ping.
Drumeo sent me a pair to check out, and they are pretty awesome for drumming. The tips are a little big for my ears, but the rubber inserts work great (foam, not so much). Check out my full review of the Drumeo EarDrums here.
Drumeo EarDrums’ capacity to seal in sound is one of their primary characteristics. Drummers can play as loudly as they want without worrying about harming their hearing because the headphones have a -29dB external volume reduction capacity. Also, a variety of tips are included with the EarDrums to guarantee a precise fit each and every time, enabling drummers to easily carry them wherever they go.
For drummers of all skill levels, in-ear monitors are a tool that is gaining popularity. In-ear monitors have become a crucial practice tool as more drummers rely on electronic drum sets and online training. In-ear monitors like the Drumeo EarDrums help safeguard the hearing of drummers everywhere by lowering background noise and enabling them to listen to their music at a lower volume.
My Experience as a Drummer with In Ears
Being a drummer, switching was a no-brainer, as I often didn’t have a wedge monitor and had a tough time hearing the rest of the band.
When I did get a wedge, the monitor guy could never get it right anyway. If you decide to switch from wedges, there are some amazing benefits to building a drummer
If you invest in every piece of gear we use, not only will you have amazing mixes, you will have virtually the same mix every night you play a show (give or take a little change due to mic placement).
You will have the ability to have a stereo
Wired or Wireless In-Ear Monitors?
Wireless
When we first started out, I used the wired technique as the cost for this setup is relatively low. In this example, we will be running our in ear monitors (that we just bought) into a small, powered mixer (like the Behringer Xenix) that is sitting next to us.
The monitor engineer at the club is going to give us one or two XLR lines from his or her monitor board that will provide us our monitor mix to our ear. Here’s how you can set it up.
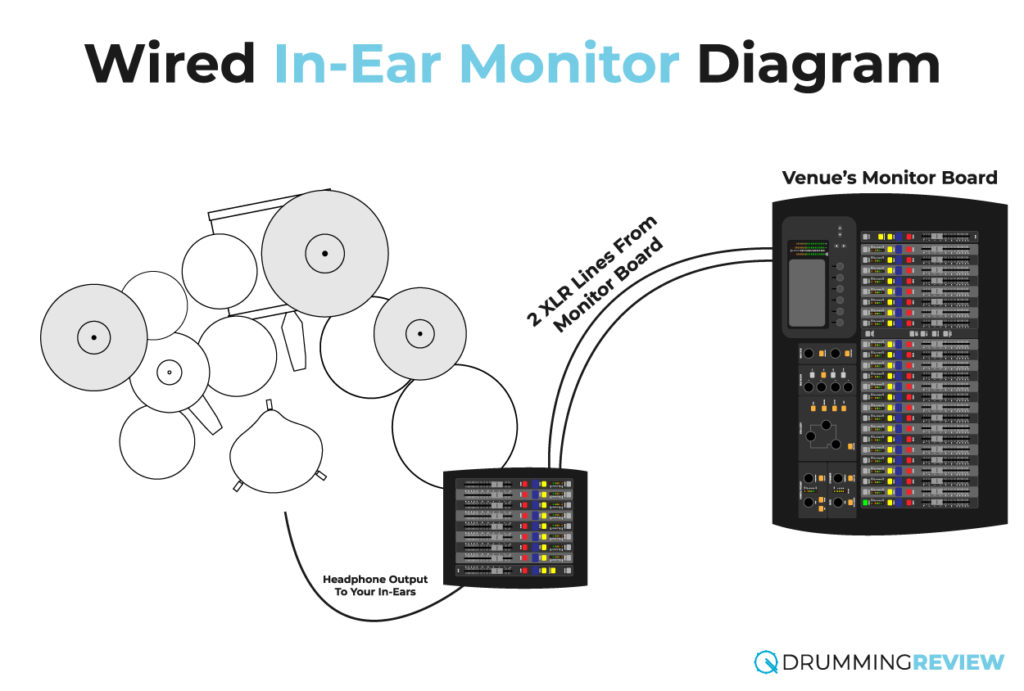
One thing to note — If you find yourself not having enough slack from your small mixing board to your in ear monitors, you will need to purchase a headphone extension cable.
This is the most budget-friendly form of in ear monitors for drummers. If the other guys in the band get jealous of your in-ears, they are somewhat up a creek. There’s no way they will want to be on stage with a headphones extension cable.
In this situation, you will need to ask the house monitor engineer to give you a line from the monitor console to plug into your mixer.
If you want stereo, don’t be afraid to ask. If it isn’t possible, they will tell you. It’s just one more line they need to run to you.
You will need to have your mixer sit next to you or mounted on a trap table.
It will be your responsibility to tell the monitor engineer what you would like in your mix and how loud you want each instrument during your band’s soundcheck.
What About Backing Tracks and a Click?
You’ll definitely want to have in-ear monitors. While not necessary, using wedge monitors will be close to impossible, to say the least.
If you are in a band that needs to use backing tracks live, I’ve written extensively on how to setup a backing track system for your band.
Moving to Wireless In-Ear Monitors
If you want to be free from a headphone extension cable on stage, your next move is to get a wireless in-ear receiver system and a body pack.
Sennheiser makes a great unit that we use called the EW. You can run this system with two body packs in mono, or one body pack in stereo.
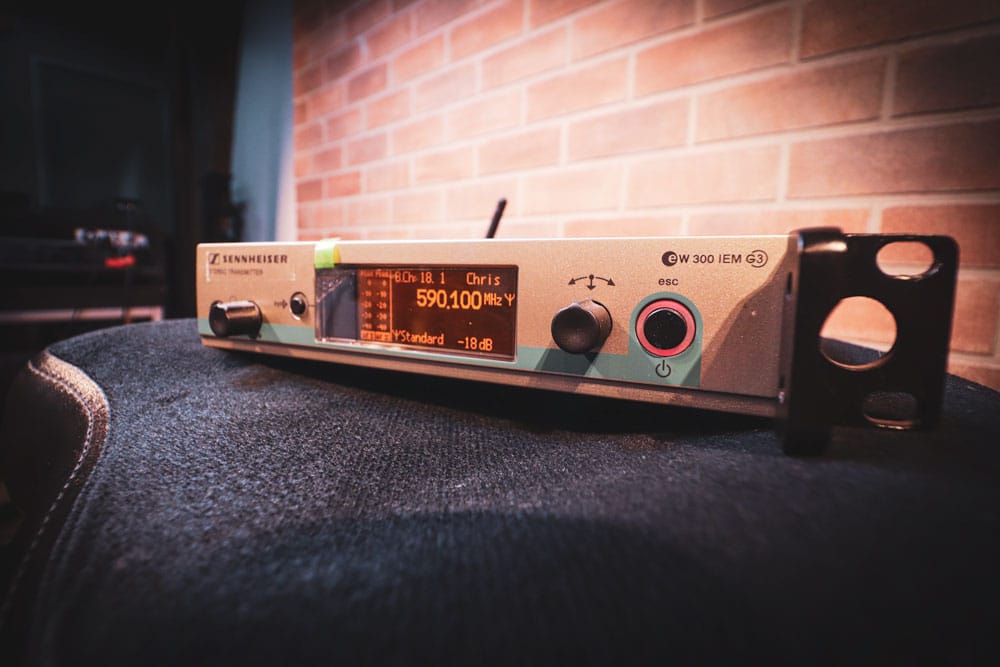
Now, moving to a wireless in-ear monitor system isn’t exactly cheap. One Sennheiser EW unit is nearly $1,000, so bear that in mind. If you have to have wireless, I can’t recommend the unit more. But in good faith, it’s hard for me to convince you to justify that cost.
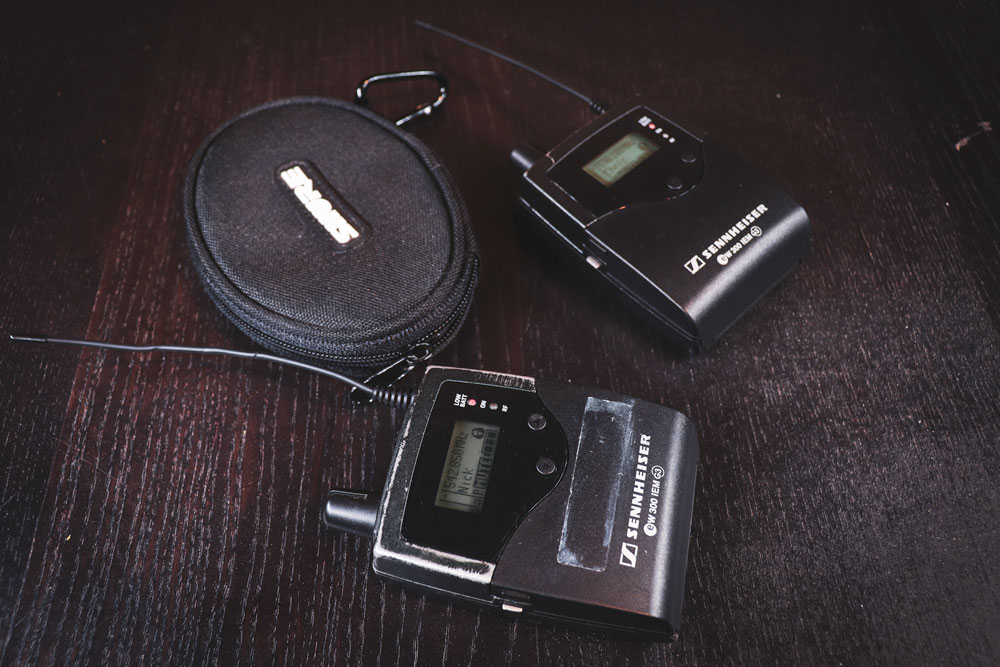
You take each pack and pan them opposite of each other. This is where it starts getting pricey. There’s also a bit of technical understanding involved, like which frequency band you’re operating on, which band model to purchase.
I haven’t had much of an issue with the Sennheiser unit, but the signal can be a little dodgy on huge stages, like amphitheaters. If you’re playing a lot of big stages, you may want to pick up an antenna, as well.
If you have the means to, I highly recommend getting one of these units for each member of the band. The price will add up quick, but it will be well worth the investment.
Which Frequency Band to Buy?
You may notice that there are lots of different frequency bands to choose from when looking at IEMs. I’m not to savvy on why you should pick one or the other, I just know which one to avoid.
Avoid any system that operates in the 600 MHz range.
On April 13, 2017, the FCC announced that wireless microphone systems in the 600 MHz band are no longer permitted and must no longer be used after the summer of 2020.
If you happen to have a unit that uses this band, you’re going to have to switch. Fortunately, a lot of the manufacturers are offering a rebate when you trade your unit in. Sweetwater is even offering up to $600 cash back.
FCC changes beginning in 2017 included an auction buy of 600 MHz frequencies. The frequency range of 614-698 MHz is affected. If your unit operates in this range, you will be forced to cease use no later than July 13, 2020.
Getting a Rack for Your Gear
The unit is rack mountable, which I highly recommend doing. You don’t want to be hauling this thing in a backpack or something. I started out with a little four-space rack that sat on the ground next to my kit. It worked, but was a pain to lug around.

Eventually, we were able to move to a 16-space OSP rack that housed everything from our X32 Rack, our splitter snake, DI boxes, and even our router. In this situation, you will still need to ask the house monitor engineer for a line from the monitor console as well as ask for a mix from the board.
Not perfect yet, but you are wireless now. Be sure to keep your rack somewhere near you on stage to get the best signal possible with the least amount of interference. If you are hearing a lot of static, it’s time to switch frequencies.
Bringing your own board for your in ear monitor system
If you are ready to ditch the house monitor engineer, it’s time to bring your own monitor board. This is the final piece of our drummer in ear monitor setup.
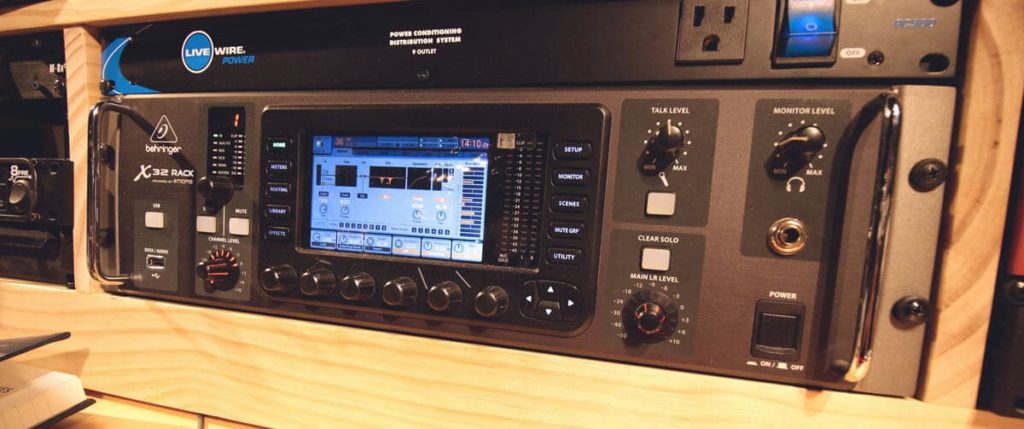
Technology has improved so much in the past few years that we are now able to carry a 16 channel mixer in just a few rack spaces that is controlled via iPhone or Android.
The one that we use is called the Behringer X32 Rack. As I have said before, this is where things get pricey, but is still at the lower end of the buying market.
Instead of asking the monitor engineer for more keyboards in your mix, you’ll have control of it from your iOS or Android device.
If you are considering going self-contained, you may want to consider bringing your own microphones to shows, as well. Having the same consistent setup every night really makes a difference, especially if you own your mics.
Behringer’s Tarnished Name
A lot of people have given Behringer a bad name, and rightfully so. But in the past few years, they have been working hard to re-brand their identity as company that makes quality products; the X32 is one of them.
It comes in a few different formats: rack, core, compact, and the full board. They all have the same core unit. For our purpose, we bought the Behringer X32 Rack.
This unit replaces the house monitor board with one you travel with. It’s compact size allows it to fit in your rolling rack and live on stage with you and your wireless receivers. Put this unit at the bottom of your rack.
Everything will stay patched. No more asking house engineers for lines, no more wasting time with monitors at soundcheck.
With the X32, you are able to have a mix that is nearly identical every night of a tour. You also have access to your mix on your phone.
It truly is a game changer.
We have done a few tours with ours and we have never had an issue with it. This is by far the best in
If you don’t have a rolling rack to house all your gear, it really does make it easier every night.
Loading
If you’re bringing your own monitor board, such as the X32 Rack, you will need a splitter snake. Effectively, this will split the channels on stage into two.
One set of channels will go to your X32 Rack and the other set of channels will go to the front of house board.
We currently are using a rack-mounted split snake from CBI. Our first two snakes were stage boxes that sat on the floor. If your split sits on the floor of the stage, be careful with it. Seriously.
Make sure no one steps on it. We’ve had channels fail on us at shows and soundchecks; it’s not a fun time. Be sure to label it well to save time on stage. We’ve bought a total of three different splitter snakes over our touring history; don’t make the same mistakes with the ones we got.
In order to get it up and running every night, you will just need to patch your XLR split snake into the back of the X32 Rack. Now your band is self-contained in monitor world.
If your split snake is mounted in the same rack as your X32 Rack, you won’t have to do any patching the night of (in the back of the rack, anyway)!
Adding More Channels to the X32 Rack
If your band has more than 16 channels, you may need to grab a Behringer S16 or S32. This will allow you to expand to 32 inputs on the X32 Rack. There is a workaround for not needing this immediately.
You eliminate channels from your ears that are not necessary for monitoring.
For example, I could eliminate snare bottom, kick out, hi-hat, run a keyboard in mono, etc… to bring down our channel count to 16.
Expand Your Inputs on the X32 Rack via ADAT
With this method, you will lose the ability to use the USB interface on the X32 Rack until you replace the ADAT card with the USB card you removed.
If you want to lose the USB card on your X32 Rack, Behringer sells a external card that supports ADAT inputs.
What is ADAT?
ADAT is short for Alesis Digital Audio Tape, and is a fantastic way to send eight channels of audio with one optical cable.
You can use something like the MOTU 8PRE (or any other eight channel preamp that supports ADAT) to get eight more additional channels to your in ears without having to purchase an expensive S16.
Use a Router
In order to use it with your phone or tablet, you will need a decent router that you can mount in your rack.
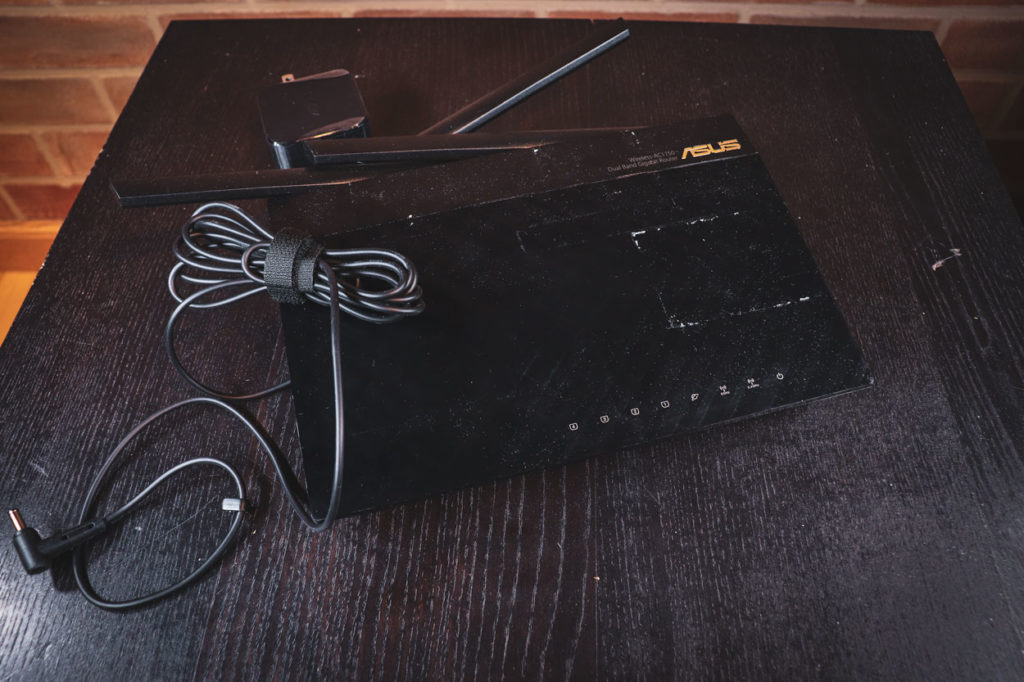
I think we picked up a mid-level router at Best Buy and have been using it for the past year and a half. Your iPad (or whichever device) will then connect to this network and you can control your mix from the stage.
There’s also some companies that make rack-mounted routers, but I haven’t had any experience with them.
Skip the XLR Split if Your Sound Engineer Uses an X32
Since the X32 and the rack variant play so well together, you can connect both your monitor board and front of house board with one CAT5 cable, via AES50.
Not only will this save time out front, it will make both yours and your FOH’s lives much easier before a show.
You’ll have faster soundchecks, the ability to have virtual soundcheck, and pretty much the same mix every night on tour. In fact, I barely touch my iPad before shows!
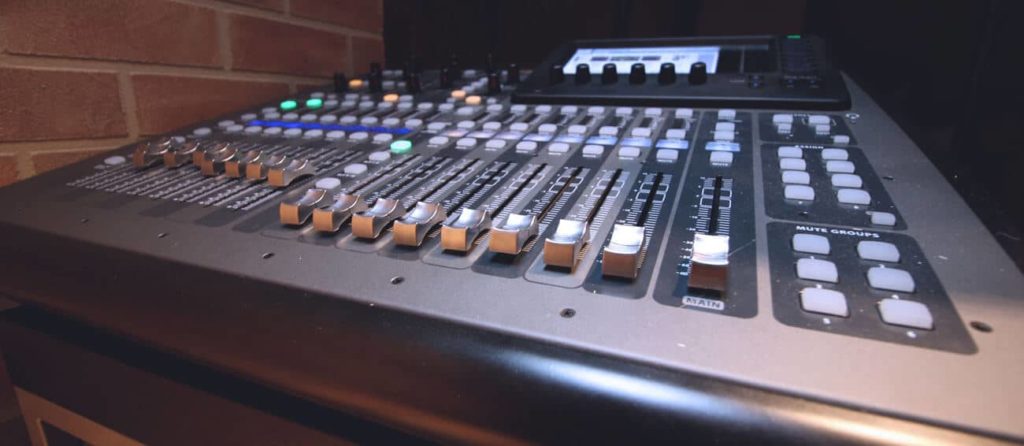
We recently picked up a X32 Compact and my world has changed. I was able to ditch the splitter snare completely, as well as some of our DI boxes we used for backing tracks. It’s a game changer!
Virtual Soundchecks with In Ear Monitors are a Game Changer
One of the greatest features of modern digital soundboards is the ability to run what is known as a virtual soundcheck. The sound engineer connects a computer to his or her X32 at a show and records the entire show in multitrack.
During soundcheck the next day, the sound engineer can run the multitracks through the X32 through the PA at the next venue and mix the room without the band even being on stage.
This greatly reduces the time required to soundcheck and makes it easier on opening acts who usually get shafted on soundcheck time.
What to Consider When Looking for In-Ear Monitors
Buying in ear monitors is a major investment. If you’re planning on getting an entire in ear monitor system, you’ll have to spend thousands to get quality gear. It’s better to invest once rather than buying lower end gear that you’ll need to replace as you grow.
Although we highly recommend the in-ear monitors above, it’s worth noting that there are countless options available. With this in mind, we’ve put together a few key factors to consider when selecting the ideal set of IEMs for your needs.
Sound Isolation
To ensure you can hear your desired mix over the noise of whatever is closest to you on stage, your in-ear monitors must have sound isolation capabilities. Look for a model that offers somewhere around 37dB of sound isolation.
Drivers
The number and quality of drivers heavily influence price and sound quality. While there are professional in-ears with eight drivers, the minimum you should aim for is two. You’ll get one for your bass and one for your treble.
It’s also a good idea to check the impedance (shoot for 22 ohms) and sensitivity (around 109dB) of the drivers.
Ear Tips
You should heavily consider any material going into your ear canal. Typically, IEM ear tips use silicone or foam materials, though the best choice depends on your preference.
Silicone tips use suction to stay secure while moving, although they are not as effective at canceling noise as foam tips. This is because foam tips have greater density. Unfortunately, they aren’t as stable in the ear canal and could be impacted by a sweaty performance.
I’d recommend looking for IEMS that offer various tip options for experimentation so you can find the right ones for your needs.
Custom vs. Universal In-Ear Monitors
Big shot drummers often get custom in-ear monitors specially molded to their ears. With such high prices, however, many people have to settle for the universal ones designed to fit most ears.
Luckily, most of these universal in-ears can do the job well. So you’ll only need to upgrade to custom ones once you’ve found your soulmate IEMs.
Pay attention to the primary material if you’re sticking with the universal gang. There are plenty of options, such as carbon fiber, metal, and resin. Finding the right ones means finding the perfect spot between the metal’s durability and the resin’s comfort.
Carbon fiber is the bee’s knees, but it costs a pretty penny.
What Makes up an In Ear Monitor System
In it’s most basic form, here’s what makes up a professional IEM system.
- In ear monitors
- Wireless bodypack and reciever
- Digital mixing board
- Additional antennas for longer range
Without going into too much detail, this lists the bare bones requirements for creating an IEM setup.
Keep in mind that you can eliminate the wireless receiver and bodypack if you opt to use a headphone extension cable.
Care For Your IEMs Cable
While you’re on stage, you’re going to be moving around. Depending on how much energy your band outputs, this could be either a ton or very little.
Those movements do have adverse effects on the longevity of your in ear monitors and the cable provided. Depending on which one you buy, be sure to have backup cables that you can swap out in the even that one goes bad.
Keep Your In Ear Monitors CLEAN
I can’t stress this one enough. It’s super important to keep your IEMs clean. The last thing you want is to be on tour with an ear infection. Most in ears come with a cleaning tool that you can use to get the excess wax and debris out of the headphone.
You’ll also want to purchase backup foam inserts if you don’t have custom molds. I find that after I change out a foam insert after a while, the sound of my in ear monitors opens up once again and I can hear the high end that was previously blocked from ear wax.
Always Have a Backup Pair
In the event that you happen to misplace your more expensive IEMs, it’s a good idea to have a spare set of in-ears ready to go at all times.
You’ll never know when it will happen and being prepared for the worst can save what would have been a canceled show.
Dangers of Using In Ear Monitors
When it comes to anything audio, hearing is of utmost importance. Protecting your hearing should be your number one priority whether music is your career or just a hobby.
One common misconception about in ear monitors is that they always will protect your hearing since they isolate the drums and other instruments. However, if you have your IEM pack volume too loud, you can easily damage your hearing. The same can be said for any kind of headphones.
Using a limiter is a great idea. Random static can be deafening and RF interference is very common when using wireless systems. A limiter will effectively limit the level of volume that can be sent through your pack. This is standard on most wireless units, so be sure to make sure you have this feature activated.
Are There Bluetooth In Ear Monitors?
The simple answer is no.
Many people have been asking if it’s possible to use Bluetooth headphones as a wireless transmitter for in ears. While the technology is impressive and seems to be improving every day, it’s still not at a point where it is feasible to use Bluetooth for monitoring purposes.
You might think that it would be possible to get a pair of isolating Bluetooth earbuds, pair it to your iPad/Android, and monitor through your monitor board’s application on the tablet. In theory, this sounds like a fantastic idea, but it just doesn’t work.
The biggest issue with the idea of Bluetooth in
In ear monitor latency can make or break a performance, especially when playing drums. Have you ever spoke into a microphone and heard your voice delayed as it echoes through the PA and the room?
It is very difficult to speak. The same will be true with drumming.
Bluetooth range is also a big factor in this scenario. You won’t be able to travel very far and we all know that Bluetooth connectivity is both infuriating and easily drops out.
Conclusion
I hope you found our little guide helpful in your quest for the perfect set of IEMs.
When it comes to drumming live, having the proper monitoring equipment can make or break a set. With quality drivers, durable construction, and comfortable tips, you’ll have all you need to elevate your live playing.
I honestly will never go back to wedges.
The biggest downside is remembering to pack extra AA batteries for your wireless pack as well as keeping the stage iPad nice and charged. From this point on, monitor systems get really expensive.
This is the standard for most bands who are touring clubs and theaters. Let me know if your setup is similar or if you use any of the stuff we do!




Hey! Great article. If all I want to do is throw up an overhead and a kick mic and then monitor myself, do you have suggestions about doing this?? As far as mics and mixer I should use? My guitarists are really loud, so I don’t need them in my mix and bass gtr i feel next to me. of course, having some vocals would be nice, but skipping that for now. I literally can’t hear myself and no kick when wearing earplugs or I’m going deaf hearing loud amps. We’re working on having those turned down.
Thanks kindly,
Jed
Hi Jed!
This is a very simple setup, and can be achieved at a relatively inexpensive cost. I would grab a Shure Beta 52 for the kick and an Shure SM137 for a mono overhead microphone.
This kick mic is standard for live use, but the overhead is definitely “budget” level. You really can pick whichever mic your budget level determines. I’m currently using Shure KSM137s for my overheads when I play live, but these aren’t that cheap.
For the mixer, I recommend getting a small Behringer mixer with at least four inputs. The Xenyx Q1202 comes to mind. With this, you’ll be able to take a stereo mix from the monitor engineer, as well as add a click/anything you wouldn’t send to the front of house engineer. If you just need a monitor mix, you can get a mixer with just two XLR inputs. (Adding a click is also possible with just TRS inputs, which are the smaller 1/4” sized jacks on the mixer)
The mixer should sit next to your drums/instrument and you’ll plug into the headphone input, assuming you already have in ear monitors. In the past I’ve actually used a wooden table with a snare drum stand to hold my mixer, similar to a trap table.
When you’re soundchecking, you’ll have to specify to the monitor engineer that you need a line for your in ears and how loud you want each microphone and instrument.
Hopefully that helps, let me know if you have more questions!
Nick
Hello Nick, I have the kind of DIY setup you described above and I’m breaking it in at the moment. I’ve gone down the kick mic/OH mic/x1 XLR-from-the-PA-for-vocals route for club gigs. Have you any recommendations for places (which I might not have thought of) for putting the overhead mic? Currently I’m placing mine at about head height behind one of my shoulders, so I hear the kit as I would hear it without in-ears in. The rack tom is a little faint, but other than that, when playing solo, it sounds fine.
The problem is that the mic has to be located far enough back so it is out of the firing line of the sticks and consequently it allows more of the stage to bleed in. I accept that without close-miking, the stage will always bleed in, but it seems to be so hard to get a mic relatively close, on the drummer-side of the kit, without the mic or the stand being in the firing line.
Using a boom arm to get the mic over the shoulder or over the head can be difficult as well, given we drummers are forced up against the back wall. I’m experimenting with ways to clamp a mic stand to the stool, which eliminates the tripod legs of the mic stand. Even if I wanted to clamp a mic stand up on a cymbal stand, given the cymbal stands are so far away, I’d need a massive boom arm to reach over to the drummer-side of the kit, as I need to hear the drums more than the crashes etc. Tough one!
Hey Will! Yeah, getting that single overhead microphone out of the way can be a little difficult.
I picked up a Pro Line boom stand (similar to this one) and it’s really allowed for flexibility as to where my mic(s) are above me.
I’m using a stereo bar and two OH mics, but you can easily just use one mic with a stand like this.
It’s a little overkill, being that it’s pretty large, but if you have the room for it, a stand like this could work.
As far as placement, I try to center the mics between the kick and snare to capture the entire kit.


Using a stand like this also would allow you to raise your mic over your head far further than a standard mic stand would.
Hope that works! Let me know if I can help further.
Cheers
Hey Nick, I found my way back here after all this time, thanks for the reply. After much trial and error, by the end of October last year I settled on a mic boom arm, with the tripod removed, clamped to one of the cymbal stands, with the boom arm set at a right angle and the mic hanging somewhere over the rack tom. An image may be publicly visible at https://www.facebook.com/photoati66/photos/a.1455451214621536/1456290987870892/?type=3. I also have a tom arm hanging upside down inside the kick drum, with a D112 clamped to it. For the lead guitar I hang a Sennheiser E906 by the cable down the front of the 4×12 and to get the lead vocals I plug a jack lead directly into the singer’s wireless unit, which is on the drum riser.
The pros are that the mics can never be bumped out of position and the overhead gives a fairly even picture of the kit. The cons are that it is a little too close to the crashes for my liking and depending on the environment, it picks up a little more of the stage than I need. I started out with an AT2020, as I didn’t want to spend too much just to find this rig wouldn’t work.
Overall though I am satisfied, as I have full control over what I hear and even in horrible-sounding venues, I can inhabit a “world of sound” in which the kit, particularly the kick, is in my face. Also, I can just pack this crap up and set it up the next night and start from wherever the mix balance was left the night before.
Over time I have found out that if the venue’s rig is such and the soundman is competent, I can bypass all this stuff and just ask him for two XLRs, one for drums and one for vocals/guitar/piano.
Great article. We are in the process of going all in on a IEM rig (self-contained) using the X32 as well. Biggest question we have is the work-flow when you get to the stage each night and how it varies with the venue you are playing in (small bar vs large venue)? Also, we have noticed many bands using Splitters rack mounted like the ART S8s to split the signal to the X32 and tails to the FOH. However, I have always thought if you could just use a split snake as you suggested in your blog, which I was excited to read. Do you have any issues with sending Direct or Isolated with the split snake because I believe the S8 handles all that in the split etc. Also, what is your work-flow when you show up at a stage and do you keep the short end of your split snake always connected to your X32 at all times within the rack. We are trying to figure out the best process to hook everything up for the Sound tech and venue and does that process differ when on a bill of 5 different bands or headlining the show. Thanks so much, once again, outstanding article and great blog!
Thanks, Terry! I’ll do my best to address the questions you have. This is going to be a little long, so grab some coffee haha.
Work-flow is definitely dependent on each venue. Some night’s it’s as easy as leaving the IEM rack next to my kit and running the 25′ FOH tails to the house split, which is usually situated at the left or right of the stage at their monitor console. This is pretty much the case with all shows we’ve done, as having that 25′ really helps out.
At larger venues, we have had to use sub-snakes when our IEM rack had to be further away from the band. We’ve only had this issue at outdoor amphitheaters and arenas during radio or festival shows.
I have made the mistake at these larger shows telling the engineers working we were completely self-contained when we actually weren’t (we needed a sub-snake to get to the monitor desk, which is why it’s smart to bring one to be safe). The engineers weren’t too pleased but did accommodate to make the show happen. The key is just to be prepared to the best of your ability.
Regarding the S8, I’ve also seen many bands using it to split their microphone signals. It seems like it would work just fine! I don’t have any experience with it personally.
What I like about a splitter snake is in its name: snake. From my understanding, the S8 would require the use of an additional XLR snake that presumably could stay patched in the back of the rack. I think it’s pretty much the same idea, just a little different of a setup. The S8 does give you the option of a pad and a ground lift. Anything we’ve needed this application for has already been achieved at a DI box or microphone (keyboards, drum pads, overheads, tracks, etc). Depending on the size of your input list, you might need more than just one S8 unit, given that it’s only eight channels.
The splitter snake we use now is a CBI 32 channel Earsplitter with 6′ and 25′ tails. It’s rack-mounted, so we don’t have to worry about someone stepping on it. The 6′ tail stays coiled up and connected to the back of the X32 rack, while the 25′ tails go to the monitor desk. Workflow is simple as rolling the rack on the stage, grabbing the 25′ tails, and plugging in 1-24 to the house split. The house engineer should have our stage plot and be able to understand all of our channels right away (and I say should because sometimes they never get it).
By owning the X32 Compact with the X32 Rack, I don’t even touch the tails now. One CAT5 cable runs from the back of the X32 Rack to the X32 Compact (usually run above the stage). This is a gamechanger, as my responsibility now relies on just patching the microphones to the front of the rack.
Regarding the process differing with five bands on the bill? Yes, I think it would a little bit. If you’re showing up as an opening act with a super intricate setup, no one will likely be happy. I would keep it simple depending on what stage you’re at. Using a splitter snake is probably your best bet. If you are opening, it’s probably wise to cut down on as many unnecessary inputs as possible (reduce stereo inputs from keyboards and tracks to mono, drop overheads, etc). Many times, the headlining act’s engineer won’t be open to repatching their lines. This only applies if they are using the house FOH console. If the headliner brings their own console, like we have in the past, you should have no problems.
Be sure to have a very detailed, but simple, input list. One piece of software we used to make our is StagePlotPro. It’s kind of outdated now but will get the job done. There’s also a newer iOS app called StagePlot Guru, but I haven’t a clue if it works well.
Prior to the show, get in contact with the venue and the other bands to get a feel for the situation you’re going into. I can’t stress this enough.
Prior to national tours, it’s common for the headlining band or their manager to send an email chain with all the engineers and other bands CC’d trying to come to an agreement on how to make it all work. If you’re a guest on a tour, do your best to accommodate them. Things like sharing drums, cabinets, etc… are very common as you probably already know.
Hopefully this helps! I’m happy to talk more if you’d like.
Nick
Wow, this is all great stuff, really appreciate your in-depth feedback and input Nick! Very practical information that is extremely helpful. Couple of questions when you hand off the 25′ FOH tails do they need to unhook/re-patch cables that are already connected into the stage box/stage split that goes to FOH? Does your rack mounted splitter snake also split the signal into direct and isolated? Lastly, when you talk about the benefits of the X32 compact is that when you guys have your own FOH engineer running your sound for the show?
Currently, the stages we need this IEM rig for our smaller venues and maybe some larger festivals. As we kinda mentioned we are trying to figure out the most efficient process/work-flow possible that will work for most playing situations. We are trying to make the setup process on stage as fast and smoothly as possible without being a burden to the sound engineer/crew or being perceived as a burden. Our latest direction with the IEM rig is using the X32 rack mixer along with the Behringer S32 and maybe ditching the ART S8 splitters. The thought here is showing up at the venue and plugging the existing FOH stage XLR cables that are already run on the stage into the S32 output-side and then run our own supplied XLR cable to the X32 mixer and having both connected through the CAT5 Ethernet cable. So, for instance, for smaller shows/venues using the vocal mic as the example, we would take the existing VOX#1 XLR cable from the mic stand that the FOH supplied/setup and run it to the output-side of the S32. Then take our own XLR cable with our own mic attached stick it on the mic-stand and run that XLR cable to the back of the X32 mixer input. Map the signal internally from VOX#1 input of the X32 mixer over the Ethernet CAT5 connection to the S32 output-side (mapped internally) sending it over that original/existing VOX#1 FOH cable. This would be done without ever doing anything with the venue stage box cabling, it would be kept exactly running or connected as it was. The existing stage box cabling would stay in the stage box to the FOH nothing would change, in theory. This would eliminate handing off a FOH tail split from our IEM rig for them to hook up. This probably would not work for all scenarios and there would be times you would need still need to hand off tails to the FOH stage split? Also, to get the sound of any already stage mic’d guitar/bass amps and drums by the sound engineer into our IE’s, we would need to use (cab-grabber or similar) our own amp mics on the guitar/bass amps and run our own clip mic/kick mic and run those to our X32 mixer input. I hope this wasn’t too confusing but it’s a difficult process to explain in text. We are not even sure if this is feasible or not, still thinking it through, as I’m sure we missed some scenarios/variables? With all your experience playing in so many different venues please let us know if this doesn’t seem practical or will not work?
Thanks again, you have been very helpful!
Cheers!
Sorry, a couple more questions about your process or workflow to help better understanding the whole process when using a split snake. When you get to the venue do you supply all the cables that run into your snake input. Or do you use the venues cables from the vocal mics, amps and drums etc and run all of those to your input snake. Do you guys as a band run all those physically to your snake input, then run each signal thru the x32 and then hand the tails for the foh to plug in to their stage box? Do you ever have to unplug the cables first from their FOH stage box and then run that end to your snake input/box? Thanks!
1) When you hand off the 25′ FOH tails do they need to unhook/re-patch cables that are already connected into the stage box/stage split that goes to FOH?
Sometimes, yes. Usually, when the club keeps vocal mics, drum microphones, etc, patched at all times they will have to pull these. If your snake is labeled well, they should have no problem patching you in.
From my experience, most clubs don’t leave things patched from the previous night, but if they do, it’s their responsibility to help out.
2) Does your rack mounted splitter snake also split the signal into direct and isolated?
No, this is one of the drawbacks. I’ve never been in a scenario where it has been an issue, though.
3) When you talk about the benefits of the X32 compact is that when you guys have your own FOH engineer running your sound for the show?
Yes, the only time we have used the Compact is when we’ve brought our own engineer. It would just be too complicated to try to explain the setup the night of to a house engineer.
4) Our latest direction with the IEM rig is using the X32 rack mixer along with the Behringer S32 and maybe ditching the ART S8 splitters.
The S32 route could work great! The only downside is having to exclusively use an iPad for FOH mixing?
5) The thought here is showing up at the venue and plugging the existing FOH stage XLR cables that are already run on the stage into the S32 output-side and then run our own supplied XLR cable to the X32 mixer and having both connected through the CAT5 Ethernet cable
Yeah, this seems like it would be a great setup. I’ve always talked about the S16 or S32, just never picked one up.
6) When you get to the venue do you supply all the cables that run into your snake input. Or do you use the venues cables from the vocal mics, amps and drums, etc and run all of those to your input snake.
We bring all our own cables, microphones, and stands. Over the last five years, we’ve managed to pick up everything we needed.
7) Do you guys as a band run all those physically to your snake input, then run each signal thru the x32 and then hand the tails for the foh to plug into their stage box?
Yep, everything on stage (vocal microphone, drum mics, guitar mic, keyboard lines) hits the CBI splitter snake first. The 6′ set of tails remains patched into the X32 Rack at all times. I only have to uncoil the other 25′ tails and give them to the engineer working.
8) Do you ever have to unplug the cables first from their FOH stage box and then run that end to your snake input/box?
In my experience, I haven’t had to. Telling the engineer working upon arrival that your band uses an IEM system with tails usually is fine. Most people working at clubs are used to these setups now and have ways to accommodate.
Happy to help, Terry!
This is tremendously helpful! So, just to make sure we understand this work-flow precisely. You show up at the venue with all your own cabling, mics, amps, drums etc. and no matter if the stage already has some previous equipment hooked (mics/stands etc) to the stage box, you and your band members all setup up with your own gear mics/stands/amps/drums using all your own cabling to your splitter/IEM rig. The band members are doing all this with no help from the stage crew or engineers, correct? Will you also mic your own guitar amps and drums with all your own equipment and run that with your own cabling to the rig as well. No help from FOH engineering or stage crew? When that is all complete you then hand over the 25’ tails to the FOH and they take care of FOH stage box hook-up and then you are all good to go? Thanks so much!
Nic, I use a just a stereo headphone amp, 2 cables from monitor board. But limited to volume only nobs. Would the Behringer xenix headphone amp mixer give me more options?
We’re just a local, weekend warrior bar band. Behringer XR18 on-stage. We mix ourselves (no sound guy). Bass guitar and one guitar (Helix) run direct. The other guitar still uses an amp (mod volume) and the drummer plays an acoustic kit. The XR18 has 6 mono aux sends, 4 of which feed a single CAD GXLIEM4 (<$700). So the four of us up front have our own mono mix in our IEMs for under $1000 total. Drummer still uses a wedge but is IEM curious. Add in (up to) $100 each for your IEM of choice (KZ ZS10 Pros for me, $50). Stage volume is way lower with no wedges up front and only one amp. No mic feedback. Everyone can hear what they want. Less heavy gear to schlep. Win Win Win.